Now that I've set it up put yourself in the frame of mind I was in when the magnetic power cord for our mac book pro... the only full size computer we have in our house... snapped in half. I have no idea how it happened. I don't want to know. All I knew was that I wasn't buying a new cord until I got paid again and even then I was NOT happy about having to spend the money on it. So being the crafty, awesome, do-it-yourselfer that I am.... I decided to fix it myself!
Disclaimer: I am NOT an electrician, a computery type person of any kind or a Mac genius or whatever the employees at the mac store are called. I have no special qualifications other than that I can generally understand instructions. If you decide to use my "guide" to fix your power cord and your computer blows up.... I AM NOT RESPONSIBLE!!!!!
Here's what you'll need: electrical tape, exacto knife or some sort of sharp blade, a bottle of wine.
Here's what I did:
 Step One: Realize that the stupid power cord has broken. Freak out completely. Feel sorry for yourself and blame others for your situation. Drink. Alcohol.
 Realize that your child has been playing Minecraft all day and your computer is dead so you can't even google how to fix it or buy a new one.
Using your smart phone, tablet or one of the other 50 wi-fi devices in your house to google how much a new power cord costs. After realizing it costs $80 pre-tax, google how to fix a power cord.
These are the instructions I used to do this. Also, lots of comic relief about possible dog and/or rabbit electrocution.
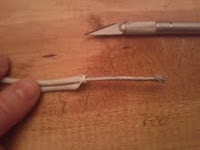
Step Two: Cut both ends of the broken wire so that you have clean edges. On one side the broken end was very close to the brick so I had to be very careful not to cut too much. Drink a glass of wine.
Remember that you have to do all of these steps to both sides of the broken wire!
Step Three: Carefully cut the outer sheath away and expose the many, many, many silver wires. Drink a glass of wine.
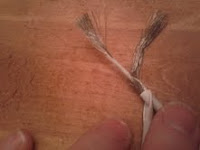
Step Four: Untwist the the silver wires and carefully pull them away from the inner sheath. Drink a glass of wine. Realize that the instruction's use of words like sheath and shaft and what they are asking you to do to them sounds really dirty. Realize that maybe you should stop drinking so much wine.
Step Five: Carefully cut the inner sheath away to expose the silver wires inside. Giggle about the term "inner sheath".
Step Six: (This is the most time consuming step.) Using the edge of your blade at an angle, scrape the inner silver wires. The wires are actually coated copper. As you scrape you will start to see that you are revealing the copper underneath.
At this point the battery on my phone died and I freaked out a little until I realized that I still had a charger for that. But once I plugged it in and started following the instructions again I stopped taking pictures but once you've seen what the inside looks like the pictures aren't as necessary. (I didn't have any pictures in the instructions I was looking at.) That's my story and I'm sticking to it.
 |
| The finished product |
Step Eight: Twist the outer wires together and wrap with electrical tape. (I did take a picture of the end the next morning.)
Step Nine: (Optional) Say many prayers, get out the fire extinguisher and drink another glass of wine.
Step Ten: Plug it into the wall and make sure it doesn't blow up. Then plug it into the computer, saying another prayer and see if you've been successful.
Step Eleven: If successful: run around the house screaming that you are the man, that you are awesome and that you can do ANYTHING!!! If not successful: Cuss, drink another glass of wine, unwrap everything and try again. Repeat as necessary.
Now you can all tell me how amazing I am.... Super Human really. Try not to be blinded by my awesomeness if you run into me on the street. I'm basically just a human being... a super one!


No comments:
Post a Comment