Wednesday, January 30, 2013

Easy, Yummy Food: Red Beans and Rice

This is a staple in my house.  It's cheap, it's easy and it's really good!  I like to cook it on a Saturday when we are at home so I can have it on the stove and everyone can just grab some food as they want it.

What you will need:  Your favorite brand of smoked sausage, a bell pepper or two, an onion or two, several ribs of celery, 4 cans of beans, salt, pepper, Emeril's seasoning, rice.

Note:  While I am certainly capable of following a recipe, I did not learn to cook that way.  My Dad taught me to cook and the way he does it is by the way it tastes, looks and feels.  If you have to have a recipe like "1 and 3/4 cup bell pepper" you will not get that from me.  I cook with what I have, what's easy to get, what I can make do with and what tastes good.  I may have to ask for some testimonials but I never get any complaints about my cooking so I believe the system is working.


Step One:  Dice your veggies and put in a bowl together.


Step Two:  Slice your sausage. Use the whole package.

Note:  I like to slice on an angle.  I seriously don't know why.  There is probably a reason that I learned at some point but I don't remember what it is.


Step Three:  Put your sausage in a big pot on medium to medium high heat.  Allow it to brown.

Note:  I like to use the same pot that I'm going to use to cook the whole thing.  


Step Three and a Half:  Remove the sausage and set aside.  You will be left with a little grease and brown stuff in the bottom of the pan.  Keep it there!  My dad calls the brown stuff "the goodness".  It is the BEST PART.  It is like the best part of the brown crispy parts of the sausage... just stuck to the pan. You want this in your beans!!

Note:  If you have more than about a tablespoon or two of grease you will want to get rid of some.  My sausage doesn't produce a lot.


See the bottom of the pan?
The goodness is not really gone!  It's
in the veggies now!!!
Step Four:  Dump HALF of your veggies in the pot ON TOP OF THE GREASE AND GOODNESS.  The moisture from the veggies will help loosen the goodness and it will get mixed up and make everything taste good.

Note:  The reason why you are putting half of the veggies in is that I like to put them in in stages.  1st stage is at the beginning to get caramelized (these will be completely mushy in the finished product); next is about halfway through cooking the beans (these will be soft at the end); last stage goes in about 10 minutes before starting to serve (these will still be fairly crunchy).

Cook these veggies on medium to medium high heat until they have begun to caramelize.  They will be brown and your house will smell wonderful.  One hint that I would give is to resist the urge to stir too often.  The longer they sit in one spot the more caramelized they will get.  Black throughout is not caramelized, it is burnt!!


Step Five:  Add the sausage back in and then add the beans.  (Dump in the whole can including the liquid.) Turn the heat way down.  They should be bubbling a tiny bit.  Season with salt, pepper and Emeril's.

Note:  Remember I don't measure anything so use your best judgement.  You will be seasoning and tasting so don't try to put too much in to begin with.

Stir and Cover and let cook.  The longer you can let it cook, the better it will taste.  Once you add the beans in it is OK to eat (meaning all the components have been cooked) but you want to try to let it simmer for an hour at the least.

Check it and stir it periodically.  Taste it when you do this and add more seasoning throughout the cooking process.

About halfway through your cooking time, add another 1/4 of the veggies (so that's half of what is left in the bowl).

Hint:  As it cooks the beans get mushy and help thicken the liquid.  I like to speed this process along by smashing some beans with the back of my spoon and stirring them in.

Hint:  If it seems like it is getting too thick add some water or chicken broth.

Step Six:  Cook white rice with whatever method you us to cook rice.

Step Seven:  Add last of veggies about ten minutes before serving.

Step Eight:  Serve beans over rice or all mixed in together. Yum!!!


Can you make it easier/quicker?  Yes! Remember that the way I showed above is the best way but there are several things you can do to cut prep and/or cooking time.  I have done all of these and always enjoy it.

  • Instead of chopping veggies, use frozen.  Almost every brand has a "seasoning blend" which has celery, green peppers and onions.  (Sometimes it has parsley too and thats fine!)
  • Brown the sausage and then dump everything into the crock and leave for the day on low.
  • Don't brown the sausage and then dump everything into the crock and leave for the day on low.
Enjoy!!


Monday, January 21, 2013

Inauguration Waffles

I promise I did not set off on a grocery expedition with the purpose of making red, white and blue waffles... it just sort of happened that way.

Benny was "feeling" the waffles
I asked Benny what he would eat for breakfast and he turned down everything I had so I told him he'd just have to starve.  He said he would eat waffles.  I said OK.  He said he would like plain waffles, strawberry waffles and blueberry waffles.  Shockingly I had all of these things in my house so I agreed but only if he would help me cook.

I'm going to get to my step by step instructions in a second but I want to admit something.  I could pretend like we woke up, got dressed and then had a perfect morning in the kitchen cooking and cleaning as we went.  It's even possible that I could have arranged the pictures in such a way that it looked like that really happened.  Instead I'd like to just leave you with a few of the things that were said/yelled so that you have an idea of what really went on this morning.

"Benny!  Stop petting the waffles!"
"Stop licking me!"
"Mom!!  I think the waffles are dying!!"
"For the love of God Benny don't do that with the knife!"
"Why are there strawberries in the carpet?"
"Benny!  Please don't touch my face with.... that."
"Mom!  I would never hurt a waffle on purpose."
"When you cook a blueberry it kind of looks like a squished roach.  That makes you not want to eat it? Well then just pretend like you are Indiana Jones and you have to."
"This is the funnest day ever.  Except not really.  That will probably be when I get a job or get married."
(I seriously got out a pad and wrote down the things we were saying to each other.

You will need:  (In addition to the ordinary things you have in your kitchen) a waffle iron, spray oil, eggs, baking powder, milk, oil, sugar, salt, flour, vanilla extract and whatever you want to mix in (we used blueberries and strawberries)

I used this recipe.  I doubled it because I wanted to have some frozen waffles for breakfast later this week.


Benny cracking an egg.  My sanity was well tested.
Step One:  Mix wet ingredients.
2 eggs
1 3/4 cups milk
1/2 cup vegetable oil
1/2 teaspoon vanilla extract
(This is the smaller batch.  I doubled this to get extra to freeze.)


Step Two:  Mix dry ingredients.
1 tbs white sugar
4 tsp baking powder
1/4 tsp salt
2 cups all purpose flour
(This is the smaller batch.  I doubled this to get extra to freeze.)


Step Three:  Mix wet and dry together

Step Four:  Mix in whatever extras you want to include.
Because we were making some plain, some with strawberries and some with blueberries we ended up splitting the batter into three separate batches so that we could add the different "mix-ins".

(Side note.  We like to cut up the strawberries small and smash the blueberries a little so that the "flavor" ends up all over the waffle.  That is Benny's explanation but I think he just likes to smash things.

Step Five:  Heat up your waffle iron.

Step Six:  Spray the waffle maker with spray oil.  (Make sure you spray the iron before each waffle.)


Step Seven:  Scoop, ladle, spoon or pour in batter.  Benny's method seemed to be of the "don't try this at home variety".

Step Eight:  Take it out.


Step Nine:  Eat


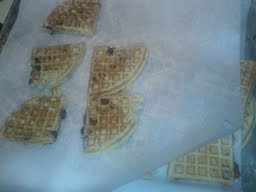
If you are freezing your waffles you should lay them out where they are not touching each other and freeze before sealing in bags or containers.  This way they won't be stuck together.  I actually had several layers separated by the parchment paper leftover from my failed craft the other night.  Win!


Sunday, January 20, 2013

Up on my soap box....

St. Mary's on the Highlands Episcopal Church
This is one of those random posts that has nothing to do with crafts or cooking but that I wanted to share anyway.  Because I can.  (Even though I do feel a little odd because I'm probably going to direct the priest who gave the sermon that prompted this to read my "bitch" blog.)

In church this week our sermon was about recognizing someone's spiritual gifts and using them to make the Kingdom of God a reality.  The sermon was about one of the readings for the day:  1 Corinthians 12:1-11.  From this I came away with the phrase:  "To each is given the manifestation of the Spirit for the common good."  What a powerful message to think about on the day before MLK Day which has become, for many, a Day of Service.

I started to think about how I use my gifts in this world.  I hope that when I shuffle off this mortal coil (sorry, I thought since I was talking religion I could be poetic) that people will remember me as someone who made a difference, even if it is a small one.

So here's my soap box.
DO SOMETHING FOR SOMEONE ELSE!!  We are all wrapped up in our own lives, we are all busy, we all have a lot going on.... but stop for a minute.  Take a breath.  Realize how lucky you are.  Think about what you can do that can make someone else's life or the world around you a better one.  Or, as my priest put it, "Bring the Kingdom of God closer to the Southside.".  It's possible that is not a direct quote.

Now, I will be the first to admit that I am not planning on using MLK day as A Day of Service.  I plan on spending the day with my son doing what he wants to do because I.... you know what, it doesn't matter.... I just am.  BUT I spend a lot of time volunteering so I feel like I'm allowed to get up on this soap box.  I thought I'd give a list of some volunteer opportunities around the Birmingham Area in the hopes that someone will see a potential to help.  These are all ministries/opportunities that I have either been involved in or have a friend that is involved in.  Hopefully something will speak to you.

The Sawyerville Work Project is a 100% free day camp in Alabama's Black Belt sponsored by the Episcopal Diocese of Alabama.  If you have a special skill they are looking for people to come in for the day and run a workshop.  If you have/are a teenager or young college age student they are looking for camp counselors.  If you can cook or buy food they are looking for people to provide meals to their volunteers during the camp.  If you have money... they want that too.

The Birmingham Hospitality Network hosts homeless families in churches while offering comfort, support and help.  Whenever they come to St. Mary's they are always looking for help with dinners and "hosts".

The Starlab is a portable planetarium that comes to Oak Mountain Elementary once per year and all of the children get to have a lesson for free.  This is also a self serving plug because I'm in charge of coordinating and training volunteers and would love some people who are interested.

The Community Kitchens feeds anyone who is hungry.  Period.

If all else fails and you are a human with blood in your body then here is a list of Red Cross Blood Donation Centers.

This is just a small list but there is so much you can do.  If you have made it all the way through this and have a volunteer opportunity that is near and dear to you please post a link in the comments.


Saturday, January 19, 2013

Crafting FAIL

We'd all like to assume we are super women/men.... people.  I'm lucky because in my case I actually am.  However....

I had some grand plans to put together wax paper chandelier that MULTIPLE people have posted on their blogs.  I'm sure that I could eventually figure out how to do this properly and maybe I just completely overestimated the amount of patience I have but it did NOT turn out well.  At all.

My niece came over to help, my sister to watch, my nephew to entertain Benny.

So we were supposed to take 3 sheets of wax paper between two sheets of parchment paper and iron them together.  I had Alex tear all of the parchment paper and wax paper into strips.  Just like the blogs suggest.

We were still feeling pretty good about ourselves so here she is.... happy that she has accomplished successfully tearing eleventy bajillion sheets of wax paper.

Then things began to get more difficult as I realized I had lost my iron.  It goes downhill from here.

After my neighbor let me borrow an iron and we get back to work I started the process of ironing only to realize that we didn't need to tear the entire box of parchment paper into strips.  You really just need two because you can reuse them because the parchment paper is just there to keep you from screwing up your iron.  (Don't worry Julie, we didn't screw up your iron.)


Whatever... Onward and upwards!!!  We start ironing things together and I hand them off to Alex.  Here's where we run into the major problem....

The whole punch I bought for $20 (I mean I had a coupon and everything so I didn't actually pay that much) SUCKS MONKEYS!!

This is the best looking circle we got.  I know that might not seem like it's that bad but you have to realize it took us twenty minutes to get ONE that looked this good.  The chandelier takes about 10 million.  I just don't have that kind of time in my life.


This is how we felt.


But Nathan had brought home beer from Hop City.


Then we got out the yarn

Tuesday, January 15, 2013

Super Human fixes Mac Book Power Cord.... Saves the Day!!

First let me explain that I am completely broke.  I'm scared to really tally up the amount of money that we spent on copays over Christmas but, sadly, I know it was at least $500.  It was not a good time to have to spend all of that money.  This is just a set up so that you understand that we were not going to be buying anything that wasn't absolutely necessary and by absolutely necessary I mean:  bread, toilet paper and wine.

Now that I've set it up put yourself in the frame of mind I was in when the magnetic power cord for our mac book pro... the only full size computer we have in our house... snapped in half.  I have no idea how it happened.  I don't want to know.  All I knew was that I wasn't buying a new cord until I got paid again and even then I was NOT happy about having to spend the money on it.  So being the crafty, awesome, do-it-yourselfer that I am.... I decided to fix it myself!

Disclaimer:  I am NOT an electrician, a computery type person of any kind or a Mac genius or whatever the employees at the mac store are called.  I have no special qualifications other than that I can generally understand instructions.  If you decide to use my "guide" to fix your power cord and your computer blows up.... I AM NOT RESPONSIBLE!!!!!

Here's what you'll need:  electrical tape, exacto knife or some sort of sharp blade, a bottle of wine.

Here's what I did:

Step One:  Realize that the stupid power cord has broken.  Freak out completely.  Feel sorry for yourself and blame others for your situation.  Drink.  Alcohol.

Realize that your child has been playing Minecraft all day and your computer is dead so you can't even google how to fix it or buy a new one.

Using your smart phone, tablet or one of the other 50 wi-fi devices in your house to google how much a new power cord costs.  After realizing it costs $80 pre-tax, google how to fix a power cord.

These are the instructions I used to do this. Also, lots of comic relief about possible dog and/or rabbit electrocution.

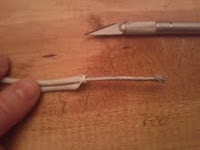
Step Two:  Cut both ends of the broken wire so that you have clean edges.  On one side the broken end was very close to the brick so I had to be very careful not to cut too much.  Drink a glass of wine.

Remember that you have to do all of these steps to both sides of the broken wire!


Step Three:  Carefully cut the outer sheath away and expose the many, many, many silver wires.  Drink a glass of wine.


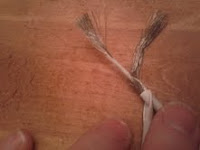
Step Four:  Untwist the the silver wires and carefully pull them away from the inner sheath.  Drink a glass of wine.  Realize that the instruction's use of words like sheath and shaft and what they are asking you to do to them sounds really dirty.  Realize that maybe you should stop drinking so much wine.


Step Five:  Carefully cut the inner sheath away to expose the silver wires inside.  Giggle about the term "inner sheath".

Step Six:  (This is the most time consuming step.)  Using the edge of your blade at an angle, scrape the inner silver wires.  The wires are actually coated copper.  As you scrape you will start to see that you are revealing the copper underneath.


At this point the battery on my phone died and I freaked out a little until I realized that I still had a charger for that.  But once I plugged it in and started following the instructions again I stopped taking pictures but once you've seen what the inside looks like the pictures aren't as necessary.  (I didn't have any pictures in the instructions I was looking at.)  That's my story and I'm sticking to it.

The finished product
Step Seven:  Twist the inner wires together and wrap with electrical tape.

Step Eight:  Twist the outer wires together and wrap with electrical tape. (I did take a picture of the end the next morning.)

Step Nine:  (Optional)  Say many prayers, get out the fire extinguisher and drink another glass of wine.

Step Ten:  Plug it into the wall and make sure it doesn't blow up.  Then plug it into the computer, saying another prayer and see if you've been successful.

Step Eleven:  If successful:  run around the house screaming that you are the man, that you are awesome and that you can do ANYTHING!!!  If not successful:  Cuss, drink another glass of wine, unwrap everything and try again.  Repeat as necessary.

Now you can all tell me how amazing I am.... Super Human really.  Try not to be blinded by my awesomeness if you run into me on the street.  I'm basically just a human being... a super one!


Saturday, January 12, 2013

Fried Dough and Various Kinds of Sugar

Quick and easy (and cheap) doughnuts.  My family was ridiculously impressed and quiet for at least 30 minutes while they ate.

What you will need: oil, sugar, cinnamon, powdered sugar, raw biscuits, a deep skillet, tongs, candy thermometer (this is optional but it gives you a slightly better idea of the temperature to have your oil)


Step One:  Heat the oil to about 240.  You want to have it hot enough to brown the biscuits but not so hot that they get too brown before the dough it cooked.

(Please don't make fun of my candy thermometer. I know all of the numbers have worn away but I can still see them if I look very closely.)


Step Two:  Cut each biscuit into 4 pieces.  This is what worked well for me.  If you'd like to have them look like doughnuts you can punch a circle out of the middle of each biscuit or you could use cookie cutters to cut shapes you like.  Remember they are going to puff up a bit and might lose some of their shape.


Step Three:  Plop the dough in the oil.  Leave on one side about 1-2 minutes.  They will start to get brown.  Once one side is brown flip them over and let the other side fry for another 1-2 minutes.


This is what they look like when you flip them over.


Step Four:  While they are cooking put powdered sugar in a bowl and mix refined sugar with cinnamon in another bowl.


Step Five:  As you pull them out of the oil immediately roll them around in the sugar.

This is the cinnamon and sugar.  Obviously I did the same thing with the powdered sugar but I couldn't get the picture to turn the other way and I was being mildly OCD about it.  So I deleted it.


Step Six:  Put them on a paper towel or a cooling rack.  I use the Alton Brown method of putting paper towels down and then putting a cooling rack on top upside down so some of the oil drains but they don't sit in the oil.


DONE!!!  OK this is a horrible picture but I was having to dodge hands in the picture.  OK... they were my hands but it was hot fried dough covered in sugar so you can't blame me.


Recap:  Writing this post took longer than the entire process of making these.  Everyone loved them.  They were absolutely unhealthy.  The only thing I had to purchase was a can of Grands (which was on sale for $1.00 at Publix this week) and everything else I already had in my cabinet.

This one will go in the "Pinterest Win" category.


Thursday, January 10, 2013

Monster Jean Patch

Jeans are expensive.  Kids are not as willing to wear patches in their jeans anymore.... were they ever willing???  Anyway... I discovered last year that Benny would wear a patched pair of jeans if I did something fun to it.  This is my "monster" jean patch.


The thing that's nice about this is that as long as you have some sort of fabric scraps laying around the house and some basic sewing supplies, the cost is $0!!!  Right up my alley!!!

Supplies:  A pair of jeans with a hole in the knee, fabric scraps, scissors, needle, thread (I decided that it needed something extra and I ended up using fabric paint as well but it's really up to you if you want to use that or not.)


Step One:  Clean up the hole by cutting the strings from in/around it.


Step Two:  Cut a piece of fabric slightly larger than the hole


Step Three:  Put the fabric under the hole and add some rick rack to look like teeth and pin in place.  


 Step Four:  Sew around the hole (I decided to use bright green but you can use a blue or something that will blend in with the jeans) making sure to secure both the fabric and the rick rack in place.


Step Five:  Using fabric, buttons, felt, etc... add some eyes.


Step Six:  I used orange embroidery floss to secure the eyes in place and add some more color.  You can use a matching color of thread.  That's the fun thing about this... it's really completely up to you!


Step Seven:  The last time I made these I stopped at step six but this time I thought it looked a little too plain so I decided to paint a little something extra with fabric paint.  

When I was done I thought maybe I should have stopped at step six but Benny liked them so I have decided to count these as a crafting "win".


I did these after I got home from work while my husband was cooking dinner.  (Don't get too excited he decided to cook Macaroni and Cheese with Sausage but it's the thought that counts.)  My point is that they are quick and easy and even though these didn't turn out, in my opinion, as good as the last ones did... they still saved a pair of jeans that would have otherwise been sent to Goodwill.  Hopefully we will get a few more wears out of these before I have to buy some more.